Manual Configuration of WordPress and Database with Trinux Router
The key to this configuration is the /25 network mask (or 255.255.255.128). This mask divides the 172.26.0.0 network into two blocks:
Name: Portelcore Team
Course: Cybersecurity CE 25/26
1. Architecture Overview
Sección titulada «1. Visión General de la Arquitectura»The key to this configuration is the network mask /25 (or 255.255.255.128). This mask divides the network 172.26.0.0 into two blocks:
- Web Network (Block 1):
172.26.0.0/25(IPs from.1to.126) - DB Network (Block 2):
172.26.0.128/25(IPs from.129to.254)
Our plan is:
| Machine | IP | Mask | Gateway (Outbound) | Network |
|---|---|---|---|---|
| Ubuntu Web (WP) | 172.26.0.20 | /25 | 172.26.0.1 | Web Network (1) |
| Ubuntu DB (MySQL) | 172.26.0.150 | /25 | 172.26.0.129 | DB Network (2) |
| Trinux (Router) | 172.26.0.1 (eth0) | /25 | - | Connects to Network 1 |
| Trinux (Router) | 172.26.0.129 (eth1) | /25 | - | Connects to Network 2 |
2. Execution Order (Very Important)
Sección titulada «2. Orden de Ejecución (Muy Importante)»We must follow this order. The Ubuntu servers will not be able to communicate until the router (Step 3) is functioning.
- Step 3: Configure the Trinux Router
- Step 4: Configure the Ubuntu DB
- Step 5: Configure the Ubuntu Web (WP)
3. Step 1: Trinux Router Configuration
Sección titulada «3. Paso 1: Configuración del Router Trinux»We will connect to the Trinux machine.
3.1. Configuring Network Interfaces
Sección titulada «3.1. Configurar Interfaces de Red»We will assign an IP to each router port. The mask 255.255.255.128 is the same as /25.
# Pata conectada a la red del Servidor Web (Red 1)# Esta será la puerta de enlace (gateway) para 172.26.0.20ifconfig eth1 172.26.0.1 netmask 255.255.255.128 up
# Pata conectada a la red del Servidor BBDD (Red 2)# Esta será la puerta de enlace (gateway) para 172.26.0.150ifconfig eth0 172.26.0.129 netmask 255.255.255.128 up
3.2. Enabling Routing (IP Forwarding)
Sección titulada «3.2. Activar Enrutamiento (IP Forwarding)»This is the command that turns Trinux into a router.
echo "1" > /proc/sys/net/ipv4/ip_forward3.3. Configuring IPTables (Allowing traffic)
Sección titulada «3.3. Configurar IPTables (Permitir tráfico)»By default, we will set the rules in DROP. We will ensure that traffic between our two internal networks is allowed.
# --- 2. REGLAS IPTABLES (NAT - Network Address Translation) ---
# Vaciamos reglas NAT por si acasoiptables -t nat -F PREROUTINGiptables -t nat -F POSTROUTING
# REGLA NAT 1: MASQUERADE (SNAT)# Permite que las dos redes internas (Web y BBDD) salgan a Internet# "enmascaradas" bajo la IP pública de eth0.iptables -t nat -A POSTROUTING -o eth0 -j MASQUERADE
# REGLA NAT 2: PORT FORWARDING (DNAT) para HTTP (Port 80)# Todo lo que entre por la pública (eth0) al puerto 80...# ...se redirige a nuestro Servidor Web (172.26.0.20).iptables -t nat -A PREROUTING -i eth0 -p tcp --dport 80 -j DNAT --to-destination 172.26.0.20:80
# REGLA NAT 3: PORT FORWARDING (DNAT) para HTTPS (Port 443)iptables -t nat -A PREROUTING -i eth0 -p tcp --dport 443 -j DNAT --to-destination 172.26.0.20:443
# Ocultar la red BBDD detrás de la IP de la red Web.iptables -t nat -A POSTROUTING -o eth1 -j MASQUERADE
# --- 3. REGLAS IPTABLES (FORWARD - Filtrado de Paquetes) ---
# Vaciamos reglas FORWARDiptables -F FORWARD
# REGLA FORWARD 1: Política por Defecto# Cerramos TODO el tráfico que quiera cruzar el router.iptables -P FORWARD DROP
# REGLA FORWARD 2: Permitir Conexiones Establecidas# Permite que los paquetes de RESPUESTA vuelvan.iptables -A FORWARD -m state --state ESTABLISHED,RELATED -j ACCEPT
# REGLA FORWARD 3: Permitir el Port Forwarding# Permitimos explícitamente que los paquetes (HTTP/S) que hemos# redirigido antes (DNAT) puedan llegar al Servidor Web.iptables -A FORWARD -i eth0 -o eth1 -p tcp --dport 80 -d 172.26.0.20 -j ACCEPTiptables -A FORWARD -i eth0 -o eth1 -p tcp --dport 443 -d 172.26.0.20 -j ACCEPT
# REGLA FORWARD 4: Permitir Web -> BBDD (MySQL)# Permite que SOLO el Servidor Web (172.26.0.20)...# ...se conecte al Servidor BBDD (172.26.0.150) al puerto 3306.iptables -A FORWARD -i eth1 -s 172.26.0.20 -o eth2 -d 172.26.0.150 -p tcp --dport 3306 -j ACCEPT
# REGLA FORWARD 5: Permitir a las Redes Internas salir a Internet# Permite que tanto la Red Web (eth1) como la BBDD (eth2)# puedan iniciar conexiones hacia Internet (p.ej. para actualizaciones).iptables -A FORWARD -i eth1 -o eth0 -j ACCEPTiptables -A FORWARD -i eth2 -o eth0 -j ACCEPT
The Trinux Router is now ready.
4. Step 2: Configuration of the Ubuntu DB (172.26.0.150)
Sección titulada «4. Paso 2: Configuración del Ubuntu BBDD (172.26.0.150)»We will connect to the Ubuntu server that will act as the DB.
4.1. Configuring Static IP (Netplan)
Sección titulada «4.1. Configurar IP Estática (Netplan)»First, we will identify our interface name (e.g., ens33, eth0) with:
ip a
Now, we will edit the Netplan file with sudo.
user.portelcore@ubuntu-BBDD:~$ sudo nano /etc/netplan/50-cloud-init.yamlThe content of the file is as follows.
network: version: 2 ethernets: enp0s3: dhcp4: true enp0s8: dhcp4: no addresses: - 172.26.0.150/25 routes: - to: default via: 172.26.0.129 nameservers: addresses: [8.8.8.8, 1.1.1.1]We will verify that the IP is correct:
user.portelcore@ubuntu-bbdd:~$ ip a1: lo: <LOOPBACK,UP,LOWER_UP> mtu 65536 qdisc noqueue state UNKNOWN group default qlen 1000    link/loopback 00:00:00:00:00:00 brd 00:00:00:00:00:00    inet 127.0.0.1/8 scope host lo       valid_lft forever preferred_lft forever    inet6 ::1/128 scope host noprefixroute       valid_lft forever preferred_lft forever2: enp0s3: <BROADCAST,MULTICAST,UP,LOWER_UP> mtu 1500 qdisc fq_codel state UP group default qlen 1000    link/ether 06:00:27:a8:9d:4e brd ff:ff:ff:ff:ff:ff    inet 172.18.33.171/24 metric 100 brd 172.18.33.255 scope global dynamic enp0s3       valid_lft 6999sec preferred_lft 6999sec    inet6 fe80::400:27ff:fea8:9d4e/64 scope link       valid_lft forever preferred_lft forever3: enp0s8: <BROADCAST,MULTICAST> mtu 1500 qdisc noop state DOWN group default qlen 1000    link/ether 06:00:27:15:e4:03 brd ff:ff:ff:ff:ff:ff
user.portelcore@ubuntu-bbdd:~$ sudo netplan applyuser.portelcore@ubuntu-bbdd:~$ sudo ip link set enp0s8 upuser.portelcore@ubuntu-bbdd:~$ ip a1: lo: <LOOPBACK,UP,LOWER_UP> mtu 65536 qdisc noqueue state UNKNOWN group default qlen 1000    link/loopback 00:00:00:00:00:00 brd 00:00:00:00:00:00    inet 127.0.0.1/8 scope host lo       valid_lft forever preferred_lft forever    inet6 ::1/128 scope host noprefixroute       valid_lft forever preferred_lft forever2: enp0s3: <BROADCAST,MULTICAST,UP,LOWER_UP> mtu 1500 qdisc fq_codel state UP group default qlen 1000    link/ether 06:00:27:a8:9d:4e brd ff:ff:ff:ff:ff:ff    inet 172.18.33.171/24 metric 100 brd 172.18.33.255 scope global dynamic enp0s3       valid_lft 6763sec preferred_lft 6763sec    inet6 fe80::400:27ff:fea8:9d4e/64 scope link       valid_lft forever preferred_lft forever3: enp0s8: <BROADCAST,MULTICAST,UP,LOWER_UP> mtu 1500 qdisc fq_codel state UP group default qlen 1000    link/ether 06:00:27:15:e4:03 brd ff:ff:ff:ff:ff:ff    inet 172.26.0.150/25 brd 172.26.0.255 scope global enp0s8       valid_lft forever preferred_lft forever    inet6 fe80::400:27ff:fe15:e403/64 scope link       valid_lft forever preferred_lft foreveruser.portelcore@ubuntu-bbdd:~$
4.2. Install and Configure MariaDB
Sección titulada «4.2. Instalar y Configurar MariaDB»user.portelcore@ubuntu-bbdd:~$ sudo apt updateuser.portelcore@ubuntu-bbdd:~$ sudo apt install -y mariadb-server4.3. Configure Remote Access to MariaDB
Sección titulada «4.3. Configurar el Acceso Remoto a MariaDB»We must tell MariaDB to accept connections to its IP, not just to localhost.
user.portelcore@ubuntu-bbdd:~$ sudo nano /etc/mysql/mariadb.conf.d/50-server.cnfWe will look for the line bind-address = 127.0.0.1 and change it to:
bind-address = 172.26.0.150We will save the file and restart the MariaDB service:
user.portelcore@ubuntu-bbdd:~$ sudo systemctl restart mariadbuser.portelcore@ubuntu-bbdd:~$ sudo systemctl enable --now mariadbSynchronizing state of mariadb.service with SysV service script with /usr/lib/systemd/systemd-sysv-install.Executing: /usr/lib/systemd/systemd-sysv-install enable mariadbuser.portelcore@ubuntu-bbdd:~$4.4. Create the Database and User
Sección titulada «4.4. Crear la BBDD y el Usuario»We will enter the MariaDB console:
user.portelcore@ubuntu-bbdd:~$ sudo mariadb -u rootWe will execute the SQL commands. These commands create the database and grant permission to the user 'user.portelcore' ONLY from the web server's IP (172.26.0.20).
user.portelcore@ubuntu-bbdd:~$ sudo mariadb -u rootWelcome to the MariaDB monitor.  Commands end with ; or \g.Your MariaDB connection id is 31Server version: 10.11.13-MariaDB-0ubuntu0.24.04.1 Ubuntu 24.04
Copyright (c) 2000, 2018, Oracle, MariaDB Corporation Ab and others.
Type 'help;' or '\h' for help. Type '\c' to clear the current input statement.
MariaDB [(none)]> CREATE DATABASE wordpress_db;Query OK, 1 row affected (0,001 sec)
MariaDB [(none)]> GRANT ALL PRIVILEGES ON wordpress_db.* TO 'user.portelcore'@'172.26.0.20' IDENTIFIED BY 'P@ssw0rd';Query OK, 0 rows affected (0,010 sec)
MariaDB [(none)]> FLUSH PRIVILEGES;Query OK, 0 rows affected (0,001 sec)
MariaDB [(none)]> EXIT;Byeuser.portelcore@ubuntu-bbdd:~$
The database server is ready.
5. Step 3: Ubuntu Web Configuration (172.26.0.20)
Sección titulada «5. Paso 3: Configuración del Ubuntu Web (172.26.0.20)»We will connect to the Ubuntu server that will host WordPress.
5.1. Configure Static IP (Netplan)
Sección titulada «5.1. Configurar IP Estática (Netplan)»As before, we will identify the interface name with ip a.
user.portelcore@ubuntu-web:~$ ip auser.portelcore@ubuntu-web:~$ sudo nano /etc/netplan/50-cloud-init.yamlWe will paste this content. Note that the gateway is different (.1):
network: version: 2 ethernets: enp0s3: dhcp4: true enp0s8: dhcp4: no addresses: - 172.26.0.20/25 routes: - to: default via: 172.26.0.129 nameservers: addresses: [8.8.8.8, 1.1.1.1]We will apply the configuration:
user.portelcore@ubuntu-web:~$ sudo netplan applyuser.portelcore@ubuntu-web:~$ ip a1: lo: <LOOPBACK,UP,LOWER_UP> mtu 65536 qdisc noqueue state UNKNOWN group default qlen 1000 link/loopback 00:00:00:00:00:00 brd 00:00:00:00:00:00 inet 127.0.0.1/8 scope host lo valid_lft forever preferred_lft forever inet6 ::1/128 scope host noprefixroute valid_lft forever preferred_lft forever2: enp0s3: <BROADCAST,MULTICAST,UP,LOWER_UP> mtu 1500 qdisc fq_codel state UP group default qlen 1000 link/ether 08:00:27:c3:4e:ed brd ff:ff:ff:ff:ff:ff inet 172.18.33.171/24 metric 100 brd 172.18.33.255 scope global dynamic enp0s3 valid_lft 6747sec preferred_lft 6747sec inet6 fe80::a00:27ff:fec3:4eed/64 scope link valid_lft forever preferred_lft forever3: enp0s8: <BROADCAST,MULTICAST,UP,LOWER_UP> mtu 1500 qdisc fq_codel state UP group default qlen 1000 link/ether 08:00:27:80:64:e4 brd ff:ff:ff:ff:ff:ff inet 172.26.0.20/25 brd 172.26.0.127 scope global enp0s8 valid_lft forever preferred_lft forever inet6 fe80::a00:27ff:fe80:64e4/64 scope link valid_lft forever preferred_lft foreveruser.portelcore@ubuntu-web:~$5.2. Install Apache, PHP, and WordPress
Sección titulada «5.2. Instalar Apache, PHP y WordPress»user.portelcore@ubuntu-web:~$ sudo apt updateuser.portelcore@ubuntu-web:~$ sudo apt install -y apache2 php libapache2-mod-php php-mysql wgetNow we will download and prepare WordPress:
# Descarregar a /tmpuser.portelcore@ubuntu-web:~$ sudo wget https://wordpress.org/latest.tar.gz -P /tmp
# Descomprimir al directori web (esborrant l'index.html d'Apache)user.portelcore@ubuntu-web:~$ sudo rm /var/www/html/index.htmluser.portelcore@ubuntu-web:~$ sudo tar -xzvf /tmp/latest.tar.gz -C /var/www/html --strip-components=1
# Netejaruser.portelcore@ubuntu-web:~$ sudo rm /tmp/latest.tar.gz
5.3. Configure wp-config.php
Sección titulada «5.3. Configurar wp-config.php»We will create the WordPress configuration file from the example:
# Copiamos el ejemplouser.portelcore@ubuntu-web:~$ sudo cp /var/www/html/wp-config-sample.php /var/www/html/wp-config.php
# Lo editamosuser.portelcore@ubuntu-web:~$ sudo nano /var/www/html/wp-config.php
We will modify these key lines.
// .../** The name of the database for WordPress */define( 'DB_NAME', 'wordpress_db' );
/** MySQL database username */define( 'DB_USER', 'user.portelcore' );
/** MySQL database password */define( 'DB_PASSWORD', 'P@ssw0rd' );
/** MySQL hostname */define( 'DB_HOST', '172.26.0.150' );// ...
5.4. Adjust Permissions and Restart Apache
Sección titulada «5.4. Ajustar Permisos y Reiniciar Apache»Finally, we will grant web server permissions to the files:
user.portelcore@ubuntu-web:~$ sudo chown -R www-data:www-data /var/www/html
user.portelcore@ubuntu-web:~$ sudo systemctl restart apache2
6. Step 4: Final Verification
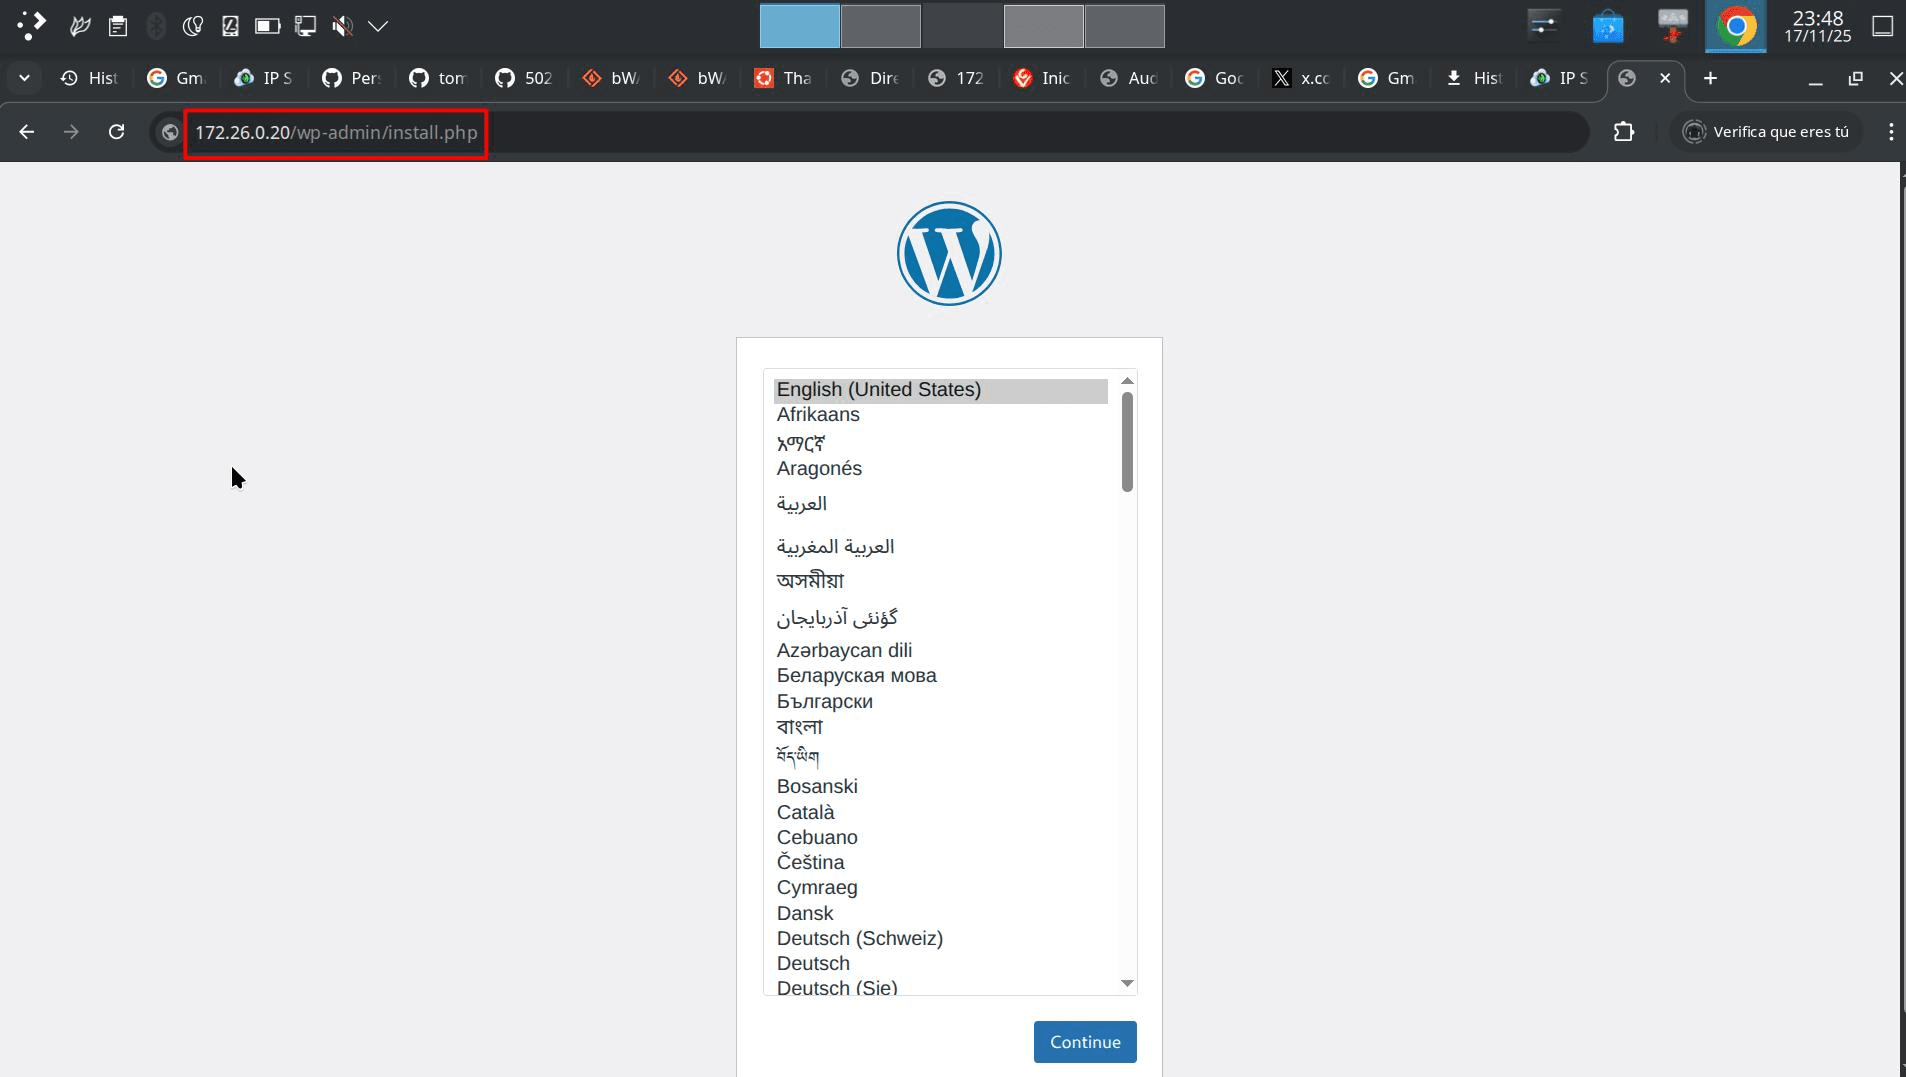
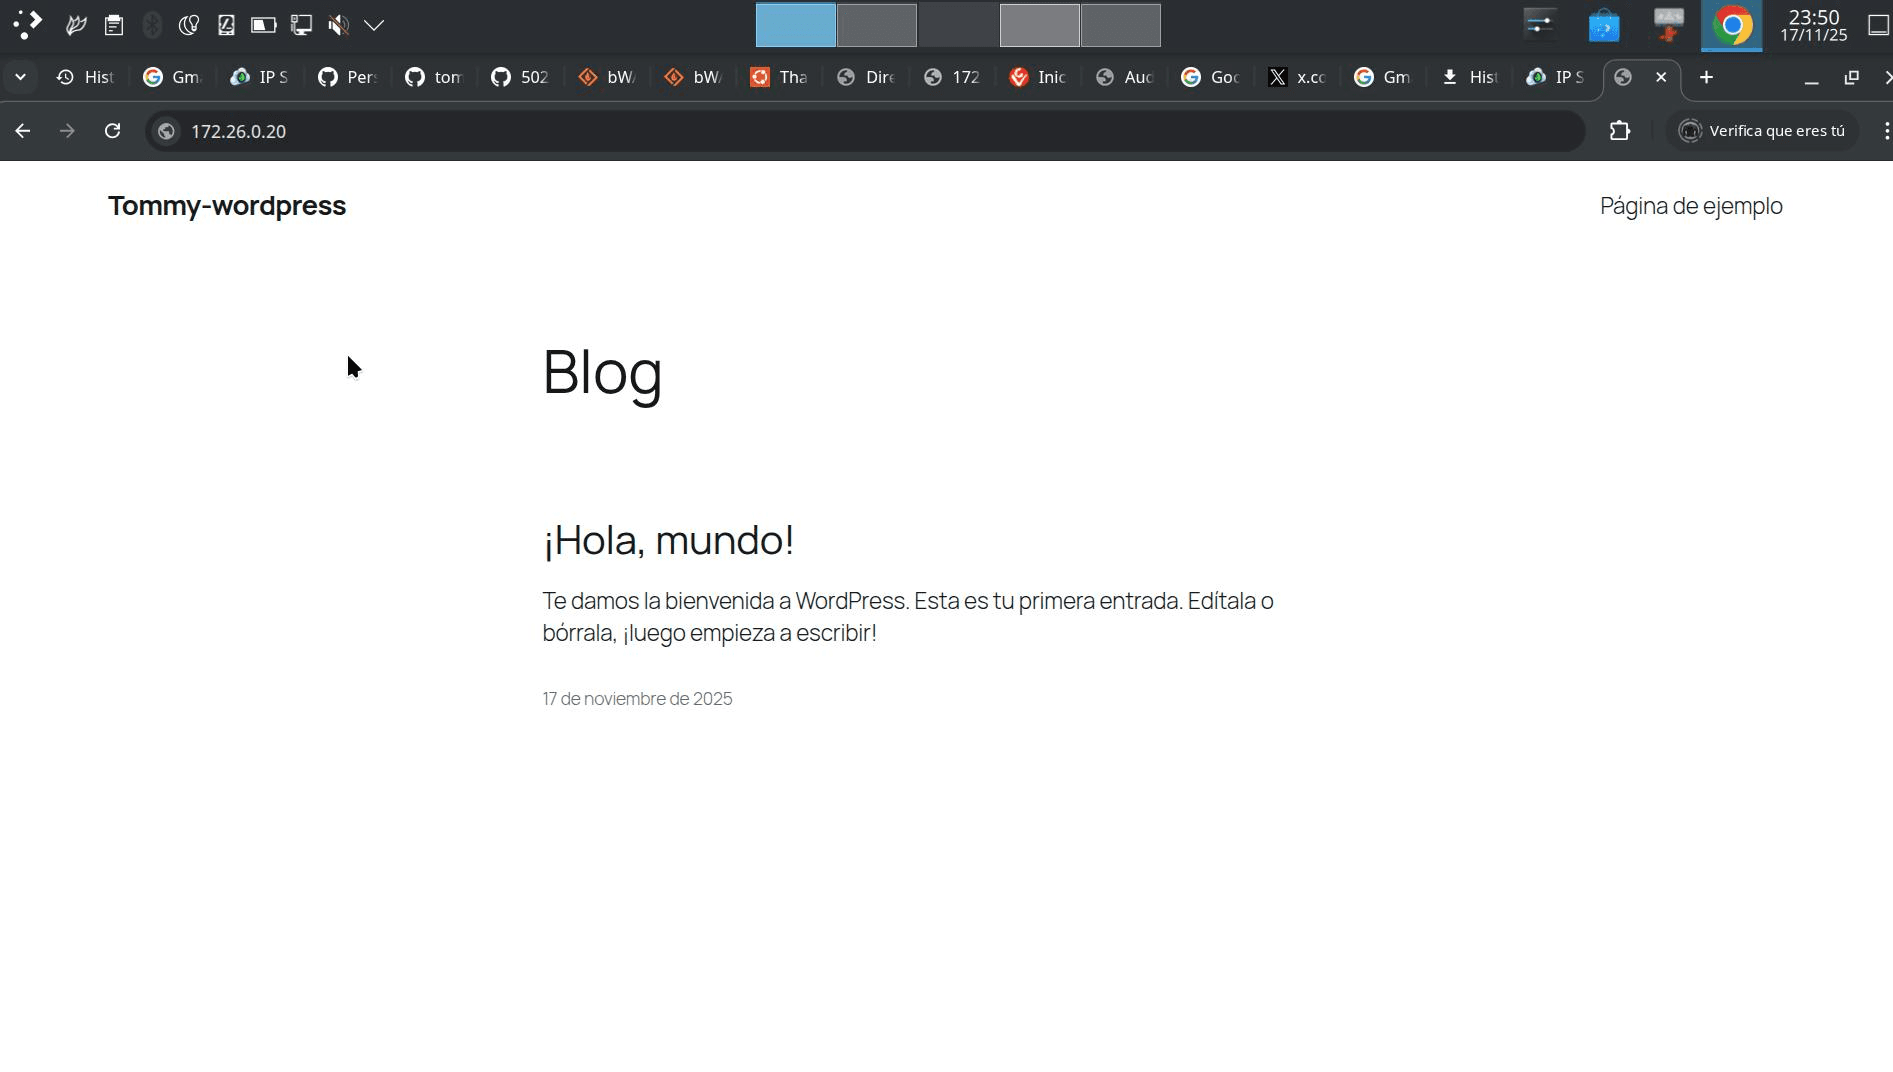
Sección titulada «6. Paso 4: Verificación Final»Now, to verify, we will go to the browser and see if it lets us access WordPress.
Therefore, we will open a web browser at the address http://172.26.0.20: